Hanging photos, shelves, and decor can leave small nail holes and dents behind over time, but filling them helps restore your walls, protect your security deposit, and leave the space looking fresh for the next person.
If you’re getting ready to move out or want to freshen up your space, knowing how to fill nail holes in your walls is a small but satisfying task that can make a huge difference. Those tiny marks left behind from picture frames, shelves, or wall hooks can add up fast, but with the right approach, your walls can look as good as new in just a few steps.
Whether you’re a renter hoping to get your security deposit back or a homeowner preparing to sell, patching nail holes is an easy DIY fix that helps your home look well maintained. Here’s a simple guide on how to fix small holes in walls and leave them smooth and ready for their next coat of paint — or the next resident.
Key Takeaways
- Filling nail holes is a quick, low-cost way to refresh your walls before moving out.
- The process requires just a few tools: spackle, sandpaper, and paint matching.
- For larger moves, Moving Help® by U-Haul offers professional assistance to handle cleaning and prep tasks efficiently.
What You’ll Need to Fix a Small Hole in the Wall
Before you start, gather a few basic tools and materials:
- Spackle or wall repair compound: For most drywall nail holes.
- Putty knife: To apply and smooth the filler.
- Fine-grit sandpaper: To even out the surface once dry.
- Primer and matching paint: For touch-ups after the repair.
- Clean cloth or sponge: To wipe away dust.
- Optional: Work gloves, a dust mask, and painter’s tape for clean edges.
If you’re repairing nail holes in wood, use wood filler instead of spackle. For trimming or molding gaps, a flexible caulk may be more appropriate. Having the right materials from the start makes the whole process easier and helps you achieve a clean, professional finish.
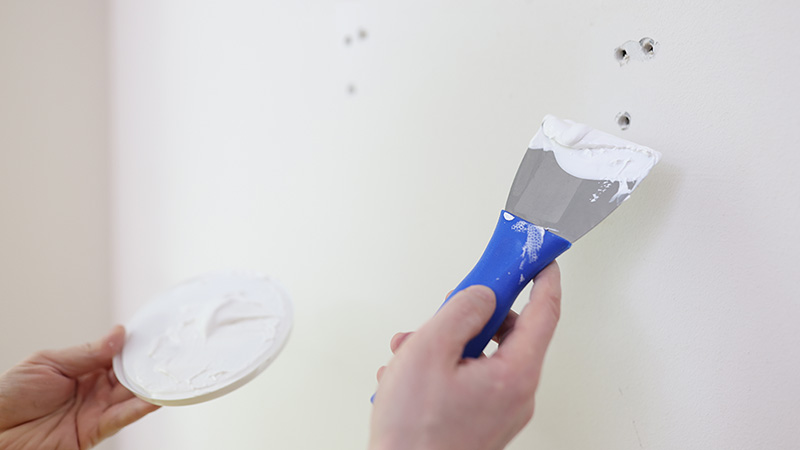
Step-by-Step Guide: How to Fill a Nail Hole
- Clean the area. Use a damp cloth to remove any dust or debris around the hole. A clean surface helps the filler stick better.
- Lightly sand. Gently smooth the area with fine-grit sandpaper. This creates a slightly rough surface that helps the spackle adhere.
- Apply the filler. Scoop a small amount of spackle onto your putty knife and press it into the hole. Smooth it flat with the wall, removing any excess.
- Let it dry. Follow the drying time on the product label (usually a few hours). Rushing this step can cause cracks or uneven textures later.
- Sand again for a smooth finish. Once dry, lightly sand the area until it blends seamlessly with the surrounding wall. Wipe away any remaining dust.
- Prime and paint. Apply a thin layer of primer, then touch up with matching paint. Feather the edges (lightly sweep outward from the freshly painted area) to help the repair blend in naturally with the rest of the wall.
With a little patience, you’ll quickly get the hang of how to fix nail holes and achieve a finish that looks as good as the day you moved in.
Extra Tips for a Seamless Look
- Match your paint type. Use the same finish — flat, satin, or semi-gloss — to prevent noticeable shine differences.
- If you’re unsure what color your paint is, ask your apartment’s maintenance manager, or if you own your home, take a small piece of the paint to your local hardware store. Also, take many photos of the color to aid in matching the paint.
- Test before you paint. If you’re unsure of the color, dab a small test patch first and let it dry fully.
- Work in good lighting. It’s easier to spot uneven filler or paint streaks when the wall is well-lit.
- Keep it thin. Several light coats of paint look smoother than one thick one.
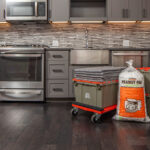
When to Call in a Helping Hand
If you’re moving out and juggling packing, cleaning, and last-minute repairs, filling nail holes might be the last thing on your list, and that’s where Moving Help, powered by U-Haul, steps in. These local, labor-only professionals can assist with everything from packing and cleaning — while you focus on filling nail holes — helping you leave your old home in top shape without the extra stress.
Whether you do it yourself or bring in a little help, learning how to fill holes in walls is a simple skill that keeps your home — and your move — looking its best.